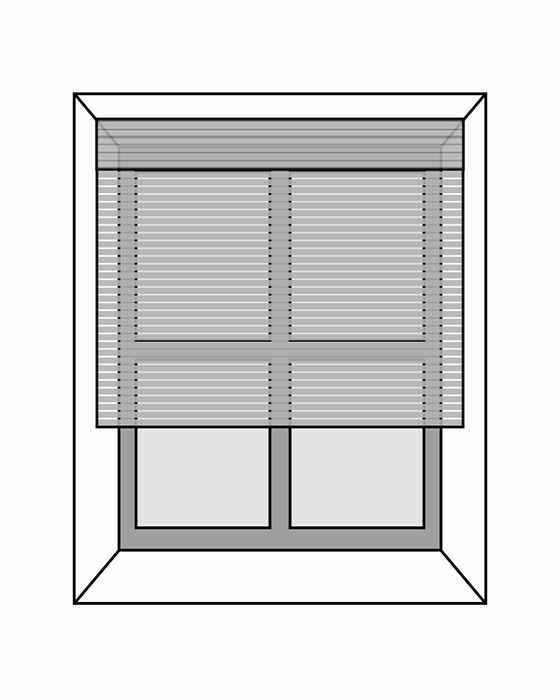
Milano Flat Fold Linen Blend Striped Cordless Custom Roman Shade
- From
- Regular price
- $205.70
- Regular price
-
$242.00 - Sale price
- $205.70
Milano Flat Fold Linen Blend Striped Cordless Custom Roman Shade
- From
- Regular price
- $205.70
- Regular price
-
$242.00 - Sale price
- $205.70
- From
- Regular price
- $205.70
- Regular price
-
$242.00 - Sale price
- $205.70


Total of 30-45% light blocked with the selected curtain with no liner

Milano
Sand

Up to 10 free swatches - $8 flat-rate shipping

Milano
Brown

Up to 10 free swatches - $8 flat-rate shipping

Milano
Green

Up to 10 free swatches - $8 flat-rate shipping

Milano
Gray

Up to 10 free swatches - $8 flat-rate shipping

Milano
Blueberry

Up to 10 free swatches - $8 flat-rate shipping
Product Details
Reviews
Installation Guide
FAQ
Specifications
- Material
- 15% Linen & 85% Polyester
- Features
- Light filtering
- Weight
- Regular (482g/㎡)
- Softness
- Soft
Care
- Do not wash or machine wash.
- For regular dust removal, use a feather duster or vacuum with a soft brush attachment.
- For small stains, gently scrub the area with a toothbrush dipped in foam cleaner or mild soap solution (following the direction of the weave). Wipe clean with a damp cloth and let air dry in a shaded, well-ventilated area.
- Avoid direct sunlight or heat when drying.


Roman Shades Instruction Mannual
Inside Mount
Drill-Mounting Installation (Inside Mount)
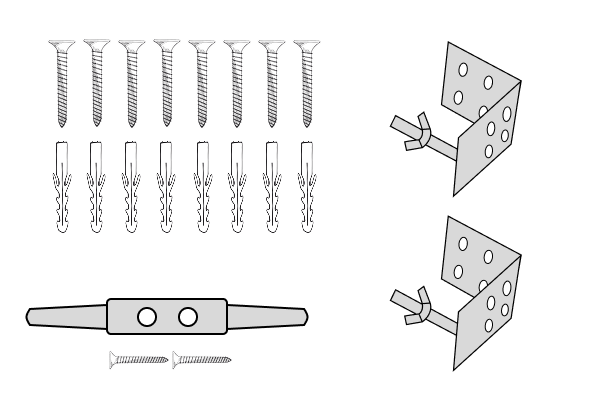
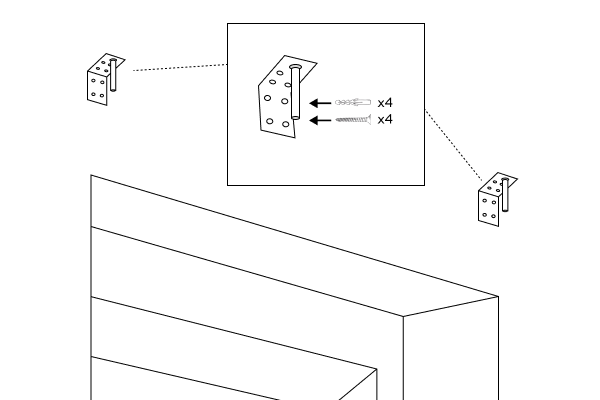
Accessories Included:
• L-shaped mounting brackets x2
• Expansion anchor x8
• 24mm screws x8
• Cord cleat x1 (Only included for corded shades)
• 11mm screws x2 (Only included for corded shades)
Make sure the bracket is installed with 1" (approx 2.5cm) clearance from the edge of the window frame to prevent the headrail from sticking out after installation.
Ensure symmetrical spacing between brackets. After confirming the location, mark the holes for drilling. Use an electric drill or screw drive to secure the brackets in place. If your wall is concrete textured please use the expansion screws for secure installation.
For inside mount, mounting brackets can be secured on top or on the side, depending on your space.

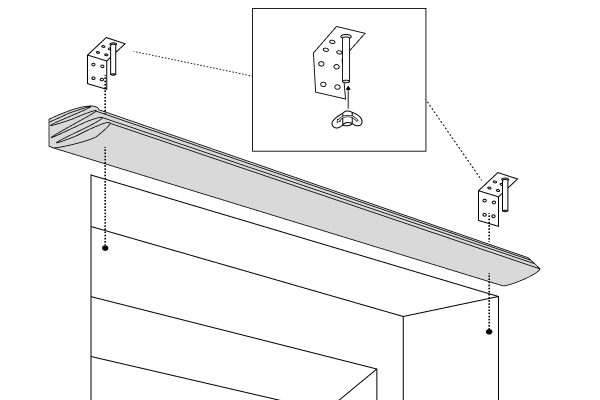
Once both brackets are installed, hold the headrail up and insert the bolt into the slit. Then rotate the nut until it is securely placed.
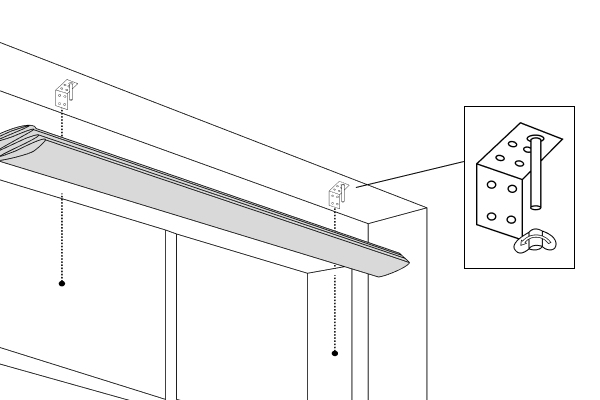
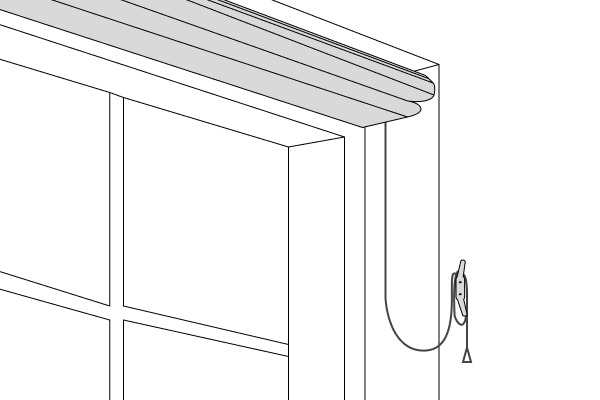
For corded shades, fix the cord cleat to the side of the window to coil shade cords, preventing accidental strangulation hazards for children and pets.

Outside Mount
Drill-Mounting Installation (Outside Mount)
Accessories Included:
• L-shaped mounting brackets x2
• Expansion anchor x8
• 24mm screws x8
• Cord cleat x1 (Only included for corded shades)
• 11mm screws x2 (Only included for corded shades)

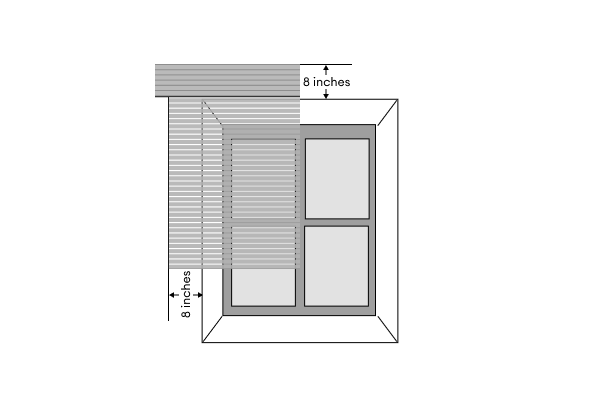
1. For optimal coverage and a finished look, we recommend installing the headrail 8 inches above the
window frame.
2. The width should be 8 inches wider than your window frame on each side for better coverage (16 in
total)
Make sure the brackets are leveled and mark the drilling holes.
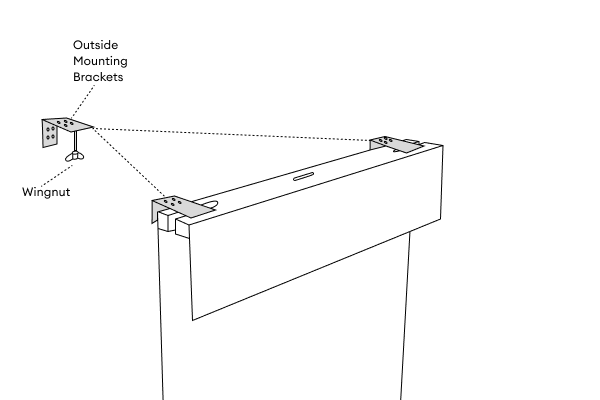
Use an electric drill or screw drive to secure the brackets in place. Please use expansion screws if drilling into concrete surfaces.
Once both brackets are installed, hold the headrail up and insert the bolt into the slit. Then rotate the nut until it is securely placed.
For corded shades, fix the cord cleat to the side of the window to coil shade cords, preventing accidental strangulation hazards for children and pets.

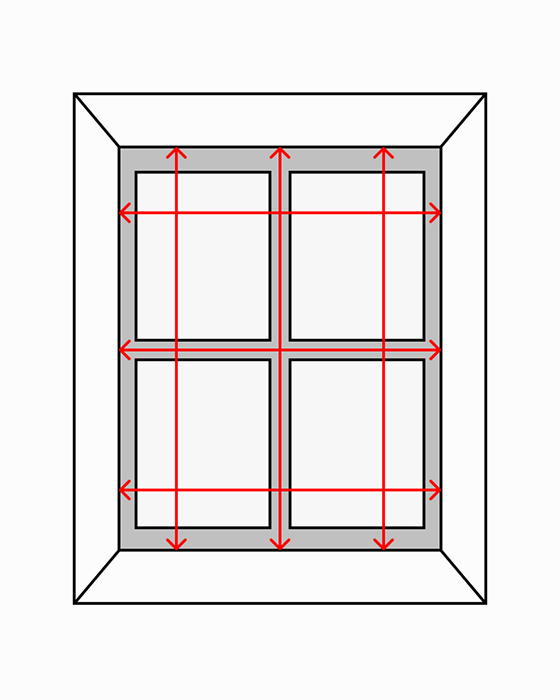
- Step 1: For WIDTH, measure the top, middle and bottom portion of the inside frame and use the narrowest width measurement. Then deduct 2/5” to ensure proper usability.
- Step 2: For LENGTH, measure the left, center and right portion of the inside frame and use the longest height measurement.
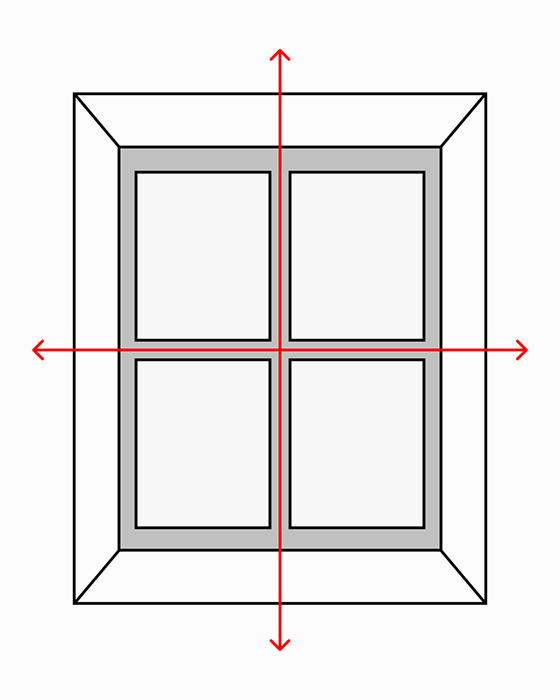
- Step 1: For WIDTH, measure the top, middle and bottom portion of the inside frame, then add 4-8” on each side to improve coverage and reduce light gaps.
- Step 2: For HEIGHT, measure from 4-8" above the window, down to where you want the shade to sit.

STEP 1
SELECT YOUR MOUNTING TYPE
 INSIDE MOUNT
 OUTSIDE MOUNT
STEP 2
MEASURE WIDTH

Our system will automatically deduct 1/2" to ensure proper usability.
STEP 2-2
ADD EXTENSIONS

STEP 3
MEASURE HEIGHT


STEP 4
YOU'RE ALL SET!
Based on the information provided, our recommended order details are as follows: