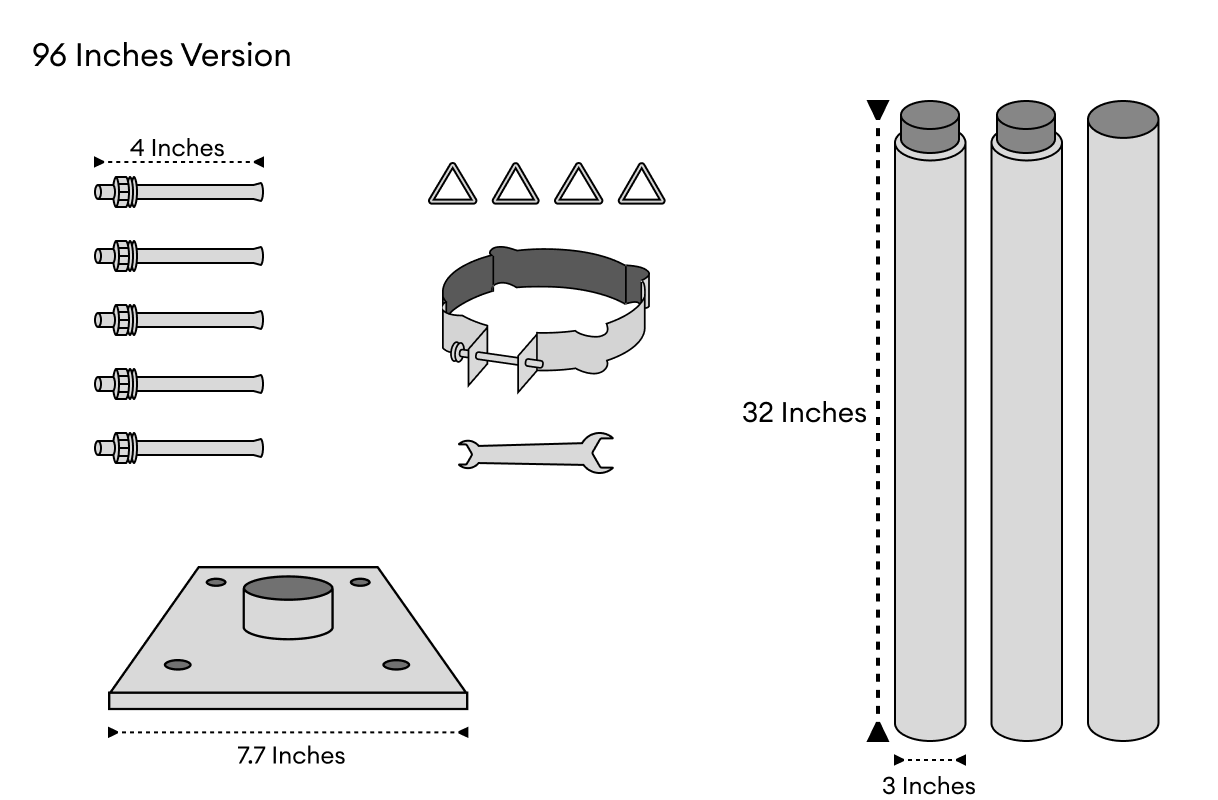
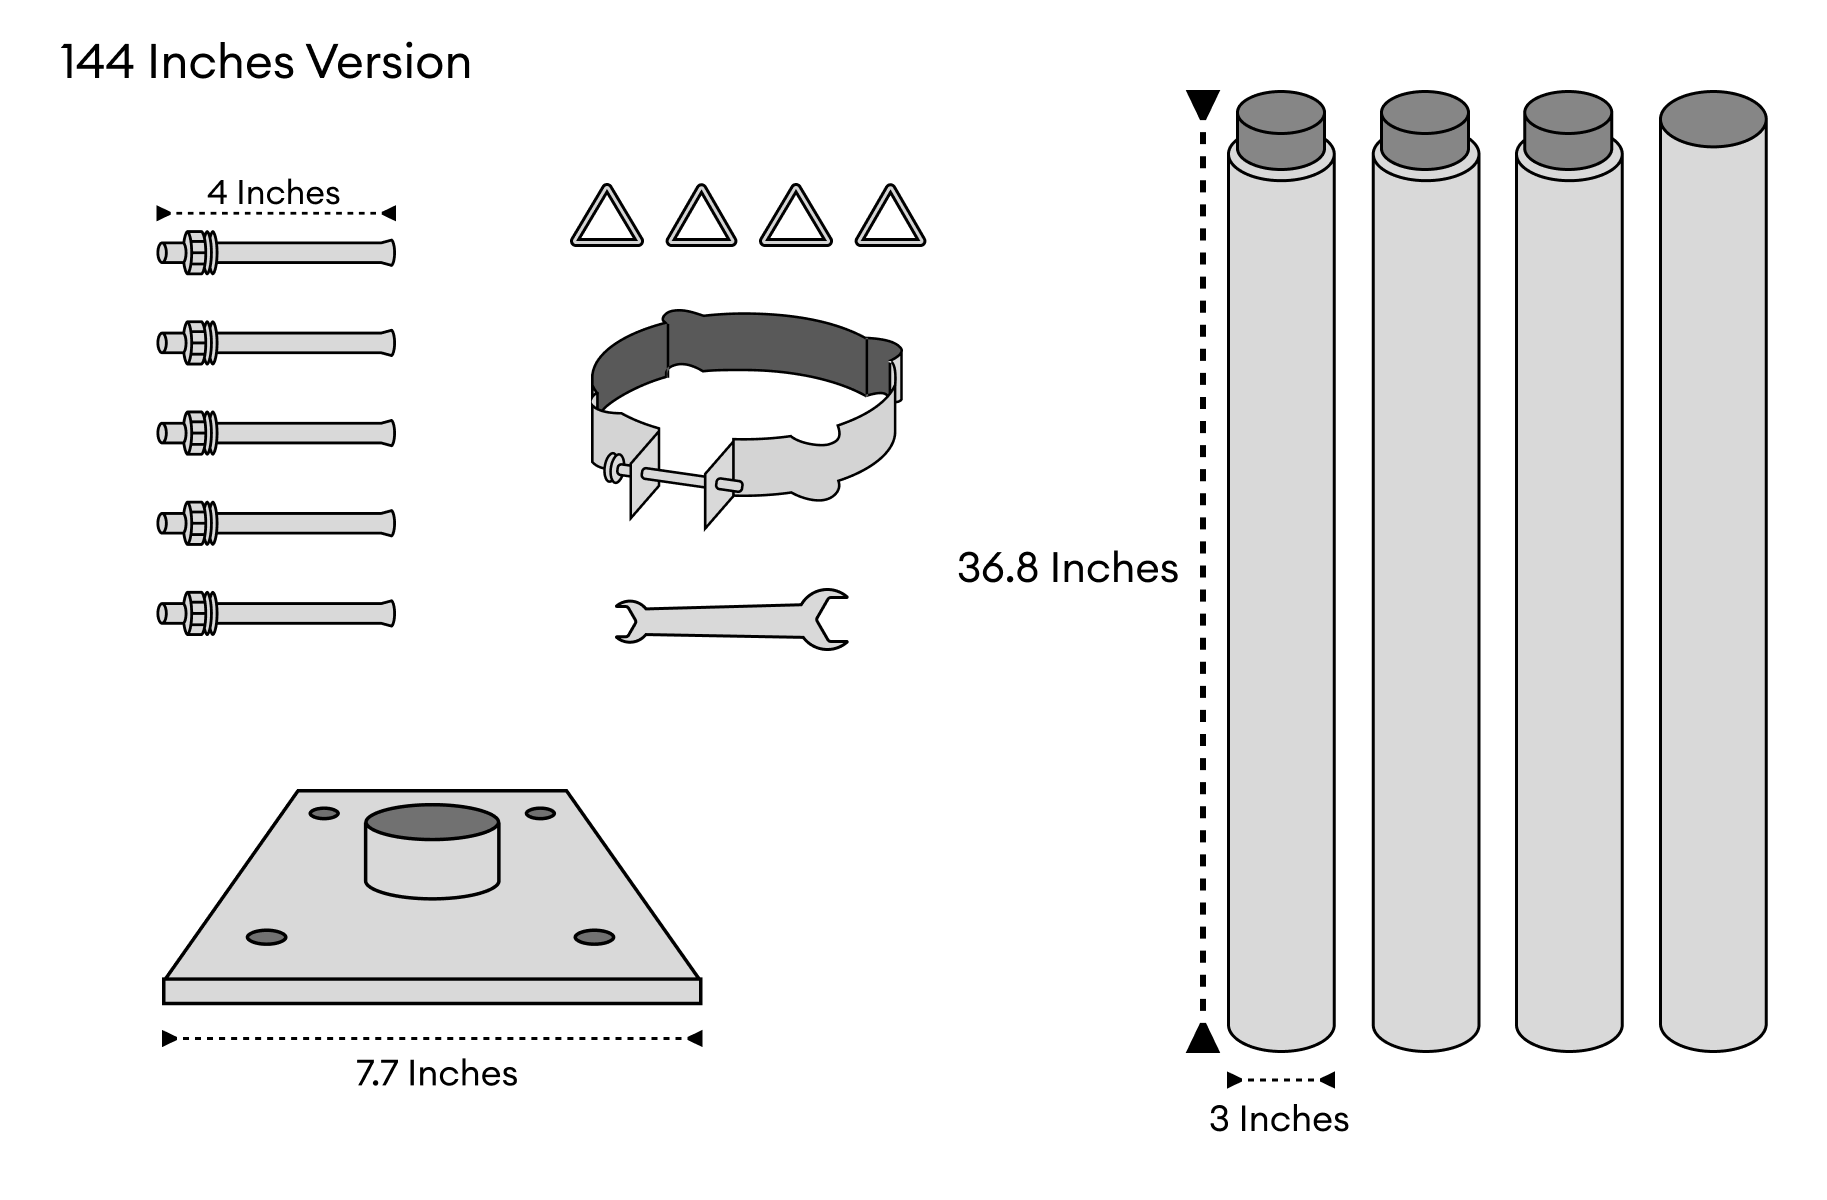
Stainless Steel Sun Shade Sail Support Pole

Regular price
$408.00
Regular price
Sale price
$408.00
Shipping calculated at checkout.

Sturdy Sun Shade Sail Support Pole:

  • Provides attachment points for your shade sails.
  • This easy-to-install, sturdy support pole is waterproof and rust-proof.
  • 304 stainless steel material, sturdy and impact resistant.

SPECIFICATIONS

Material: 304 Stainless Steel

Pole Height: 96 inches (8 ft) or 144 inches (12 ft)

PACKAGE INCLUDES

  • Base plate x 1
  • Drilling bolts and nuts x 5
  • Pole segments x 3(4 segments for the 144 inches version)
  • Triangular clamp system x 1
  • Tightening bolt and nut x 1
  • Triangular rings x 4

Threeor four pole segment length depends on the size selection

  • 96 inches version: three 32 inches segments
  • 144 inches version:four 36.8 inches segments

Shade Sail Support Rod Installation Manual Download PDF

Please refer to the section with the corresponding pole size:

Identify all the included components of the supporting rod:
• One base plate (including four expansion nails)
• One adjustable clamp (including four triangular rings, tightening bolt & nut and wrench)
• Three 32 inches pole segments. Two identical and one capped at one end
Identify all the included components of the supporting rod:
• One base plate (including four expansion nails)
• One adjustable clamp (including four triangular rings, tightening bolt & nut and wrench)
• Four 36.8 inches pole segments. Three identical and one capped at one end
The base must be drilled in to be secured. Mark four drilling points of the base and drill the holes using 12mm drill bit, suitable for any surfaces that can secure the nails including wooden foundations cement, and metal. Soft soil is not suitable.
• Insert the expansion brackets and screw on nails into the surface you drilled into.
• Screw on one of the connecting pole segments onto the base.
To attach the adjustable clamp onto the desired height. Put in the four triangular ring that goes into the clamp. Tighten the bolt and nut with the wrench.
Then screw to connect the other identical pole segments together before placing the top pole segment on lastly (with a capped top).

You May Also Like