Thistle Sheer Flat Fold Custom Roman Shade
- Regular price
- $239.00
- Regular price
-
- Sale price
- $239.00


Be the
first to write a review
We are glade to hear from you
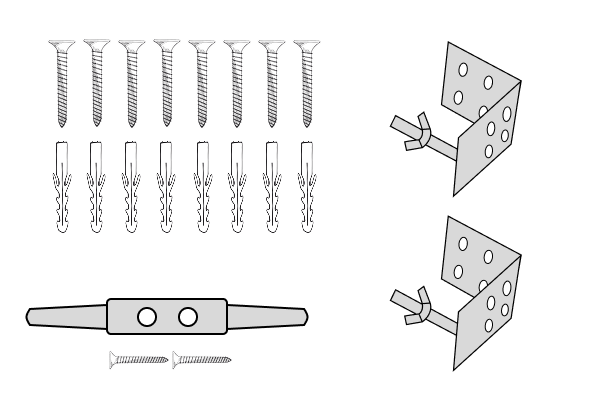
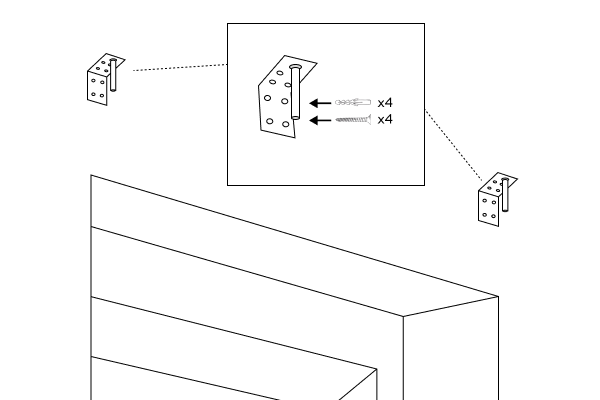
Accessories Included:
• L-shaped mounting brackets x2
• Expansion anchor x8
• 24mm screws x8
• Cord cleat x1 (Only included for corded shades)
• 11mm screws x2 (Only included for corded shades)
Make sure the bracket is installed with 1" (approx 2.5cm) clearance from the edge of the window frame to prevent the headrail from sticking out after installation.
Ensure symmetrical spacing between brackets. After confirming the location, mark the holes for drilling. Use an electric drill or screw drive to secure the brackets in place. If your wall is concrete textured please use the expansion screws for secure installation.
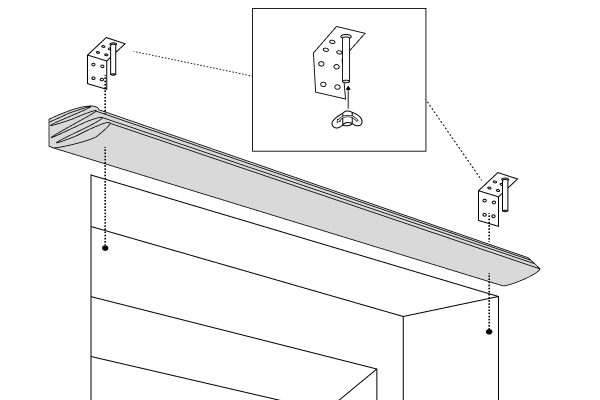
For inside mount, mounting brackets can be secured on top or on the side, depending on your space.

Once both brackets are installed, hold the headrail up and insert the bolt into the slit. Then rotate the nut until it is securely placed.
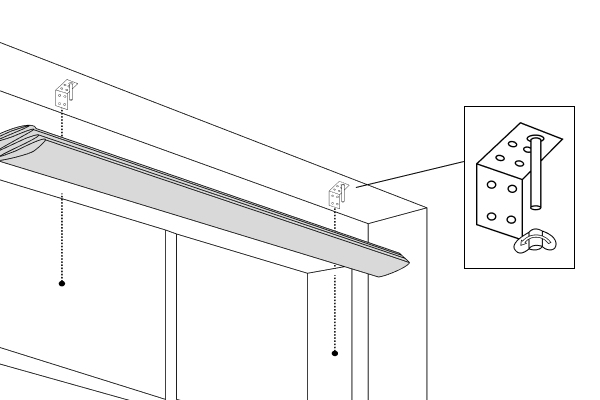
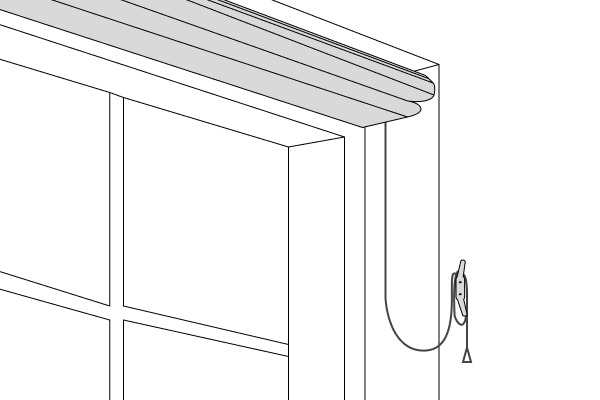
For corded shades, fix the cord cleat to the side of the window to coil shade cords, preventing accidental strangulation hazards for children and pets.

Accessories Included:
• L-shaped mounting brackets x2
• Expansion anchor x8
• 24mm screws x8
• Cord cleat x1 (Only included for corded shades)
• 11mm screws x2 (Only included for corded shades)

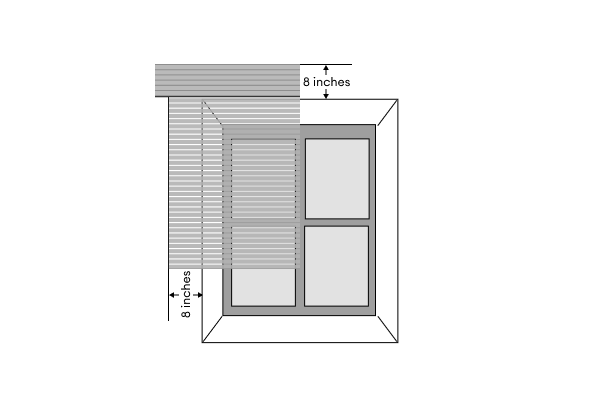
1. For optimal coverage and a finished look, we recommend installing the headrail 8 inches above the
window frame.
2. The width should be 8 inches wider than your window frame on each side for better coverage (16 in
total)
Make sure the brackets are leveled and mark the drilling holes.
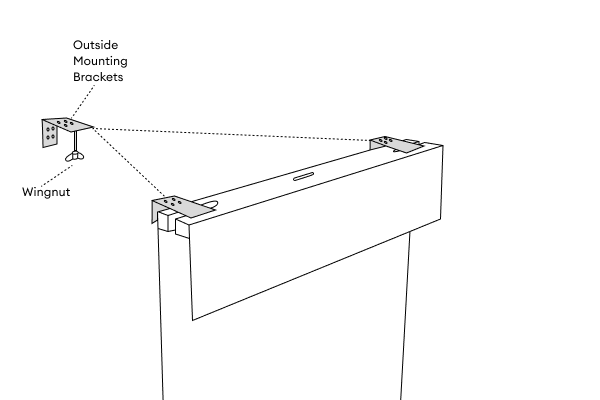
Use an electric drill or screw drive to secure the brackets in place. Please use expansion screws if drilling into concrete surfaces.
Once both brackets are installed, hold the headrail up and insert the bolt into the slit. Then rotate the nut until it is securely placed.
For corded shades, fix the cord cleat to the side of the window to coil shade cords, preventing accidental strangulation hazards for children and pets.


STEP 1
SELECT YOUR MOUNTING TYPE
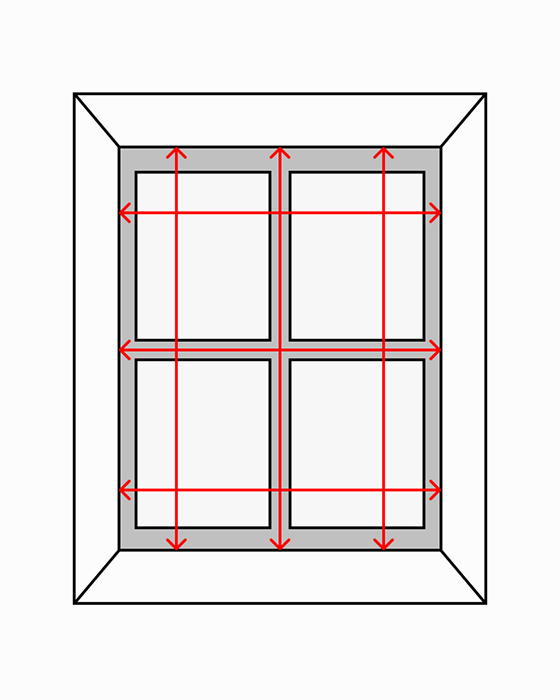
 INSIDE MOUNT
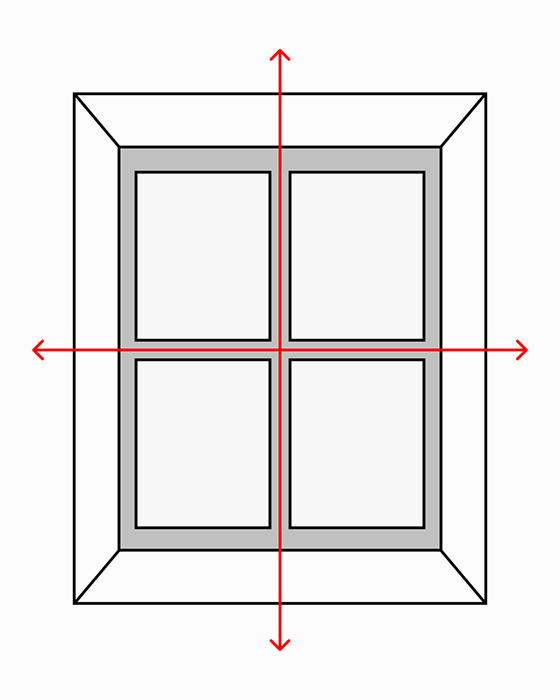
 OUTSIDE MOUNT
STEP 2
MEASURE WIDTH

STEP 2-2
ADD EXTENSIONS

STEP 3
MEASURE HEIGHT


STEP 4
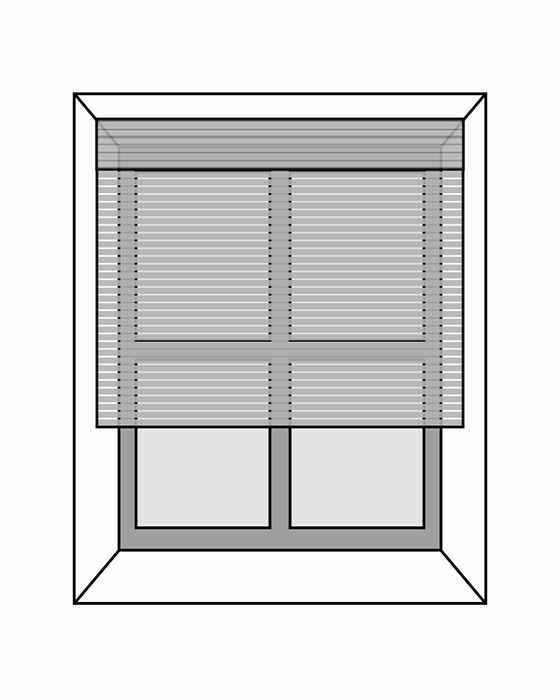
YOU'RE ALL SET!
Based on the information provided, our recommended order details are as follows:
Your Shopping Cart is Empty
Browse our latest collection or check your saved favorites to add more items to your cart.
Manage your profile, track your orders, and enjoy a seamless shopping journey with us.