10 common shade sail installation mistakes and how to avoid them


Most shade sail problems start before the first hot weekend. They usually happen during measuring, anchoring, and tensioning, when the layout still looks “close enough” but is already set up for sagging fabric, leaning posts, loose hardware, or pooled rainwater.
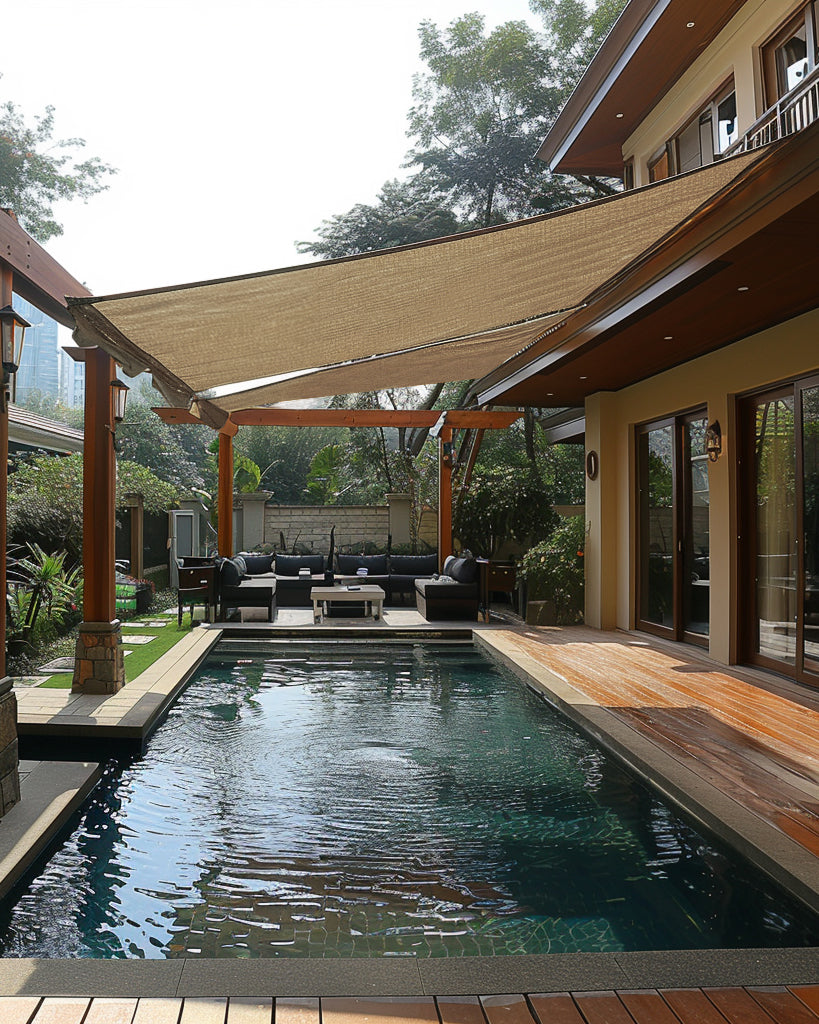
If you are planning a patio shade sail, the goal is not just to stretch fabric over a space. A good setup needs the right size, structural anchor points, enough hardware clearance, proper slope, and balanced tension.
This guide covers the most common shade sail installation mistakes, how to spot them early, and what to do before you order or install your sail.
If you are still planning your layout, start with the TheHues shade sail measurement guide. It can help you map anchor points, sizing deductions, and hardware clearance before you choose your final shade sail.
Why shade sail installation mistakes happen so often
Shade sails look simple because the finished shape is clean. The force behind that shape is not simple. A properly installed sail stays under tension, transfers load into secure anchor points, and needs enough slope to shed water when the material is waterproof.
Many problems happen because people treat a shade sail like a tarp. A tarp can hang loose and still serve a temporary purpose. A sun shade sail needs the right geometry, hardware, and tension to work safely and look clean.
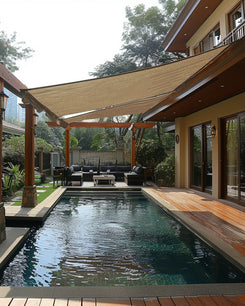
That matters for comfort too. The point of a shade sail is to create usable outdoor shade when the patio, deck, or seating area gets too exposed. If the sail is undersized, installed at the wrong angle, or aimed at the wrong part of the yard, it may not shade the space when you actually use it.
A good first step is to compare shapes and materials in the TheHues sun shade sail collection, then confirm the layout with measurements before choosing the final size.
Shade sail mistakes that happen before you order
Mistake 1: ordering the sail the same size as the space
This is one of the most common shade sail measuring mistakes. You measure the distance between anchor points, then order a sail in that exact width and length. The problem is that the hardware needs room too.
Turnbuckles, shackles, chains, and connection points all take up space. If you skip that allowance, the sail may not fit, or it may fit without enough adjustment room for proper tensioning.
The better approach is to measure the anchor-to-anchor footprint first, then deduct space for the hardware and final adjustment. Do not treat sail size as a simple patio dimension. Treat it as part of the full installation plan.

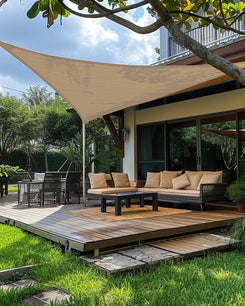
Mistake 2: choosing the wrong shade sail shape
Not every patio needs a triangle, and not every long opening should be covered by one stretched rectangle. The right shape depends on anchor points, shade timing, drainage, and how the space is used.
Triangle shade sails can work well for smaller areas, corner coverage, or irregular anchor layouts. Rectangle and square shade sails usually provide more practical coverage for dining areas, seating zones, and broader patios.
Long, skinny sails can look clean in a sketch but may be harder to tension evenly. Start with the shape that matches the structure, not the shape that looks easiest to order.
Mistake 3: ignoring sun path and shade timing
A shade sail can fit the patio perfectly and still miss the area you wanted to cool. This happens when the layout is planned around the patio slab instead of the sun angle.
Think about when the space gets harsh sun. A dining area used in the evening needs a different orientation than a lounge chair used at noon. A west-facing patio may need coverage that catches late-day sun, not only overhead midday light.
Before ordering, stand in the space at the time of day you use it most. Mark where the sun hits the seating, table, door, or grill area. Then plan the sail around real shade, not just the outline of the patio.

Mistake 4: forgetting runoff and drainage
If you choose a waterproof shade sail, drainage becomes part of the design. A flat sail can collect water in the center, which adds weight and stress to the fabric, hardware, and anchor points.
Plan a clear high side and low side so water moves away from doors, walkways, furniture, and grill stations. Do not wait until installation day to decide where the water should go.
Shade sail mistakes that weaken anchor points
Mistake 5: attaching to weak or decorative surfaces
One of the most serious shade sail installation mistakes is trusting a surface because it looks solid. Siding, trim boards, fence panels, and some fascia details are often finish materials, not structural anchor points.
A shade sail anchor needs to transfer tension into framing, sound masonry, or a purpose-built post. If the anchor only grabs a decorative surface, it may shift, loosen, or pull away over time.
Be careful with these surfaces:
- siding or cladding
- standard fence panels
- trim boards
- decorative fascia without verified structural backing
- thin pergola members not designed for tension load
If you are mounting near a house, verify what is behind the finish. If you are mounting near a fence, assume the fence is not a safe primary anchor unless a qualified installer confirms otherwise.
Mistake 6: underbuilding posts and footings
Shade sail posts are not just placeholders. They carry the load of a tensioned outdoor system, so they need to be planned as structural parts of the installation.
Posts that are too small, too short, or set in shallow footings may lean over time. Once a post shifts, the sail loses shape, the hardware carries load unevenly, and the fabric may start to sag or flap.
There is no universal footing size that fits every project because soil, wind exposure, sail size, and post material all matter. The practical rule is simple: if the post or footing feels like the cheapest part of the project, it may be underspecified.

Mistake 7: using mismatched or light-duty hardware
A strong sail with weak hardware is still a weak installation. Turnbuckles, pad eyes, shackles, snap hooks, chain sections, and wall plates should be suitable for exterior use and matched to the expected load.
Mixed-metal or light-duty hardware can corrode, bind, or loosen faster outdoors. It can also make tensioning harder, which leads to uneven corners and poor fabric shape.
If you are unsure what hardware package fits your layout, use the TheHues free design service before ordering. It is easier to adjust the plan before installation than to replace anchors after the first storm.
If your main need is side privacy, glare control, or softness along a pergola edge, also compare whether outdoor curtains make more sense than an overhead sail. Shade sails solve overhead exposure well; curtains often work better for vertical screening.
Shade sail mistakes during tensioning
Mistake 8: installing the sail too flat
A flat shade sail may look neat at first, but it can create problems outdoors. On waterproof fabrics, a flat layout encourages water pooling. On breathable fabrics, it can still reduce tension quality and make the sail look loose.
The right shade sail angle helps the fabric hold shape and gives rainwater a path off the surface. Plan the slope before ordering so the final anchor heights support the result you want.
Mistake 9: tightening corners unevenly
Shade sail tension should feel balanced, not forced. A common mistake is tightening one or two corners first, then discovering that the final corner will not reach or pulls the sail out of shape.
A better method is to connect all corners first, then tighten gradually and evenly. Work around the perimeter in stages. Check the center line, edge curve, and corner load as you go.
If one corner carries too much stress, do not simply tighten harder. That usually points to a geometry, anchor, or hardware issue.


Mistake 10: assuming tighter is always better
A good shade sail installation is firm enough to hold shape and reduce flapping. It should not be so tight that posts bend, wall plates strain, or fabric corners distort.
If a post starts leaning, an eye plate looks twisted, or a corner looks stressed, stop and inspect the anchor points before adding more tension. A slightly imperfect surface is safer than a perfect-looking sail attached to a compromised corner.
Shade sail mistakes that show up after weather
Mistake 11: leaving wind, storms, and maintenance for later
Outdoor products need a follow-up plan. Wind exposure changes by yard, season, and surrounding structures. If your area gets strong storms, heavy rain, or seasonal wind, decide in advance when to loosen, secure, or remove the sail.
Also check whether local rules, HOA requirements, permits, or underground utility marking apply before digging new post footings.
After installation, check these details:
- tension after the first few hot or windy days
- hardware movement at corners and plates
- post lean or footing shift after storms
- fabric wear near corners and seams
- water pooling after rain
If you need help with care or setup questions, keep the TheHues help center handy for next-step support.
Quick diagnosis table for shade sail problems
| What you notice | Most likely cause | What to check first |
|---|---|---|
| Center sags in the middle | Sail may be too large, under-tensioned, or installed too flat | Hardware allowance, turnbuckle adjustment, and anchor height difference |
| Water pools after rain | Not enough slope or no clear runoff path | High-low anchor layout and drainage direction |
| One post leans inward | Post or footing may be undersized, or one corner may be over-tensioned | Post depth, footing stability, and corner balance |
| Corners wrinkle unevenly | Tension may have been applied out of sequence | Back off and retighten each corner gradually |
| Hardware loosens after wind | Weak anchors, light-duty hardware, or skipped maintenance check | Structural backing, exterior-rated hardware, and post-storm inspection |
Shade sail installation checklist before you order
Use this checklist before you buy fabric or hardware:
- Confirm when you need shade most: morning, midday, or late afternoon.
- Measure the anchor-to-anchor footprint, not just the patio slab.
- Deduct room for turnbuckles, chains, and final adjustment.
- Decide whether you need breathable shade, waterproof cover, or both in separate zones.
- Verify every anchor point is structural, not decorative.
- Size posts and footings for your actual sail, wind exposure, and soil conditions.
- Build in height difference so tension and drainage work together.
- Plan how the sail will be removed, loosened, or checked after storms.
That list catches most shade sail sizing, post, hardware, and angle mistakes before they become expensive.
When to DIY and when to hire a pro
DIY can work when the layout is simple, the anchor points are obvious, and you are comfortable attaching into verified framing, masonry, or properly set posts.
Bring in a qualified installer when any of these are true:
- You are attaching to a house and cannot verify the structure behind the finish.
- You need new posts near a deck, pool, utility line, or tight hardscape area.
- Your yard gets regular strong wind exposure.
- The sail is large enough that failure could damage the home, fence, or furniture.
- You want a waterproof setup but are unsure about slope and runoff.
A good rule is this: if the project is easy to sketch but hard to explain structurally, pause and get help before installing.
FAQ: shade sail installation mistakes
How much smaller should a shade sail be than the space?
Do not order the sail to match the exact anchor span. Leave room for turnbuckles, chain, and final adjustment. The exact deduction depends on the hardware, anchor layout, and product guidance.
Do shade sails need to be installed at an angle?
Usually, yes. A height difference helps the sail tension correctly and is especially important for waterproof shade sails because it gives water a path off the surface.
Are fence posts strong enough for a shade sail?
Standard fence posts are usually not the safest assumption. Shade sail loads are different from normal fence loads, so purpose-built posts are often the better choice.
How tight should a shade sail be?
It should be tight enough to hold a clean shape and reduce flapping, but not so tight that posts bend, anchors strain, or corners distort. Balanced tension matters more than maximum tension.
What is the biggest mistake when installing a shade sail?
The biggest mistake is usually planning the sail before confirming the anchors. A shade sail only works when size, hardware, slope, and structural support are planned together.
Final takeaway
The shade sail mistakes that cost the most are usually the ones made before installation. Start with the span, verify the anchors, plan the angle, and choose hardware that fits the load. If those details are right, the rest of the installation becomes much more predictable.
Measure with hardware in mind, attach only to structural support, and treat tension as a controlled adjustment instead of a brute-force fix.
For a cleaner setup, start with the TheHues sun shade sail collection, use the shade sail measurement guide, and reach out through the free design service if you want a second set of eyes before you install.