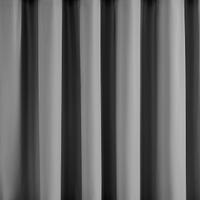
UVShield™ Striped Waterproof Custom Triangle Sun Shade Sail
- Regular price
- $119.00
- Regular price
-
- Sale price
- $119.00
Shipping calculated at checkout.
- Regular price
- $119.00
- Regular price
-
- Sale price
- $119.00
Shipping calculated at checkout.


 Free Tiebacks
Matching Tiebacks
Free Tiebacks
Matching Tiebacks
 Memory Trained
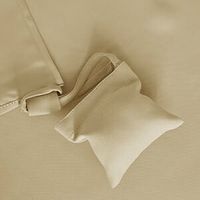 Sandbags Included
Magnetic Strip
Installation
Follow our step by step simple installation guide
Sun Shade Sail Instruction Mannual
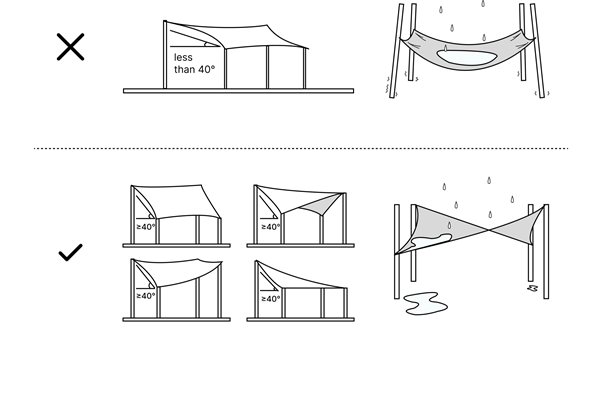
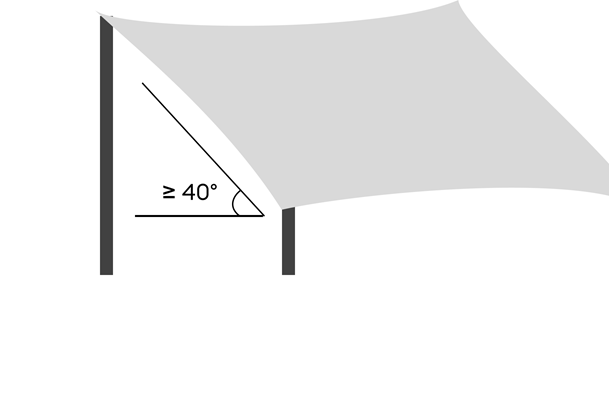
Determining the Anchor Point
Waterpooling will cause extra stress on the shade sail and your mounting surfaces. So it's recommended to
install your
shade sail with a tilt of at least 40 degree to allow water to drain. There are several different ways you
can tilt your
shade sail
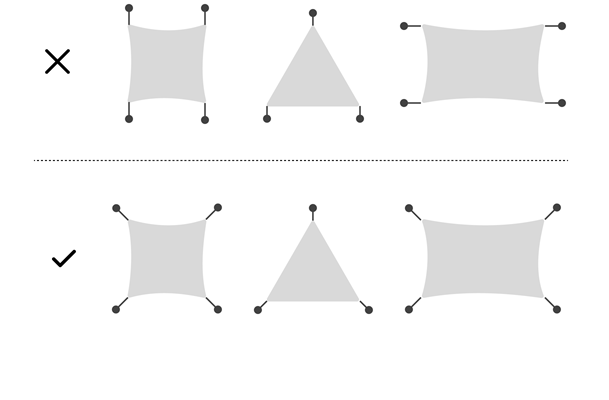
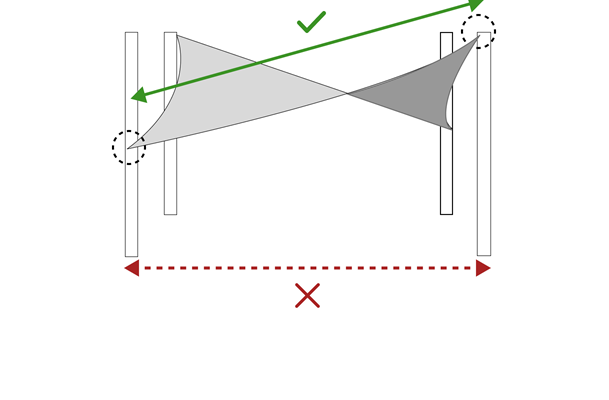
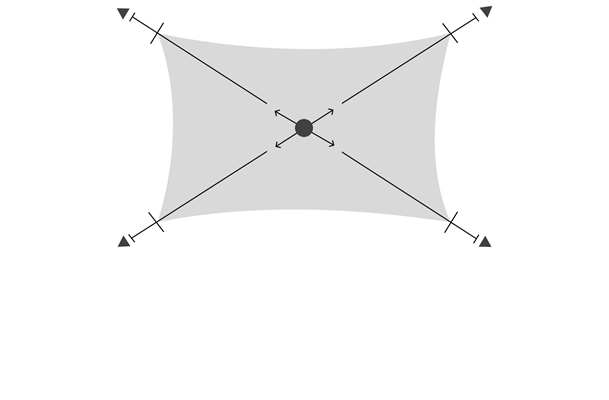
Secure the correct angle between mounting point and sail corners: make sure your shade sail are based on
the continuity
of the diagonals and not the sides. This will help create even tension and a flat sun shade surface
Take the sun into consideration. Think about what time of day you'll usually be enjoying your outdoor space
and where
you want the shade to be located for a more effective installation
Measuring the Shade Sails
Make sure you are measuring from mounting point to mounting point, and not just measuring the area on the
ground. It
might help to determine and note down the height of each of your mounting points from the ground up,
especially if you
wish to anchor the shade sail onto walls.
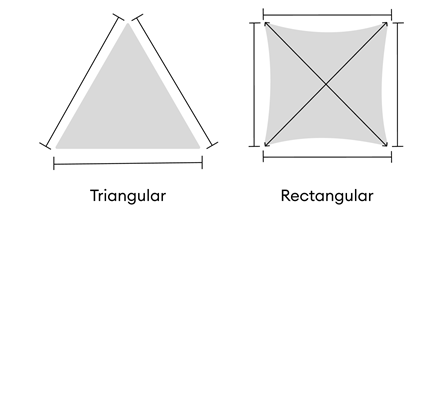
Different shaped shade sail requires different measurements to be taken
• Triangular: 3 sides
• Rectangular: 4 sides & two diagonal
• Triangular: 3 sides
• Rectangular: 4 sides & two diagonal
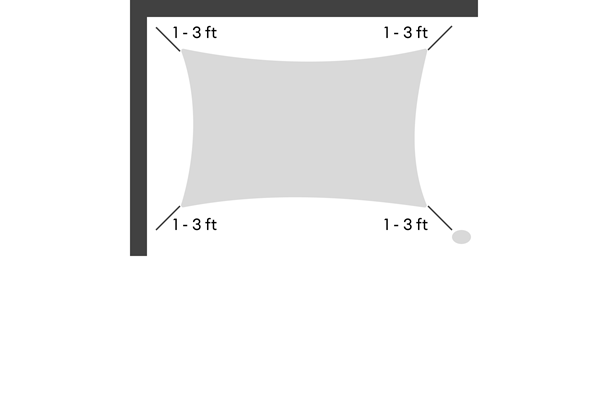
We recommend measuring from anchor point to anchor point. Based on the numbers you provide we'll deduct 20
inches on the
either the longest side or the longer diagonal (depending on which shade sail it is - specified on product
page) while
maintaining the shape to ensure a stable attachment, proper tension and minimize sagging.
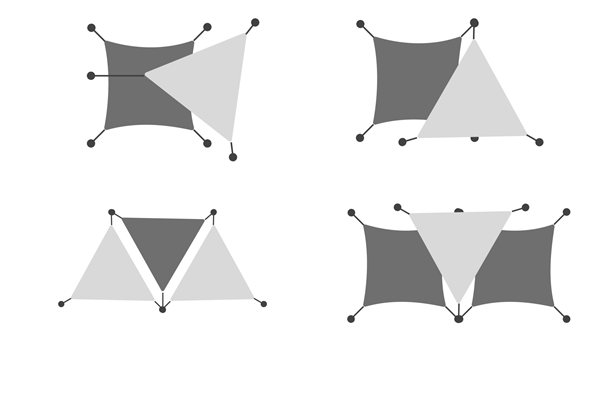
If you wish to cover a large area try combining several pieces of shade sails together.
Installing the Shade Sails
1.Place pad eye onto the determined mounting point and mark the four holes.
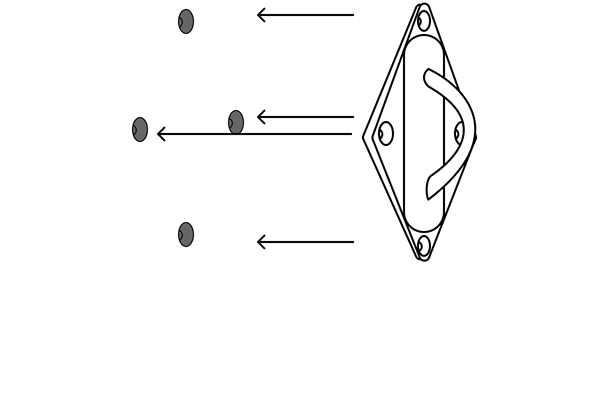
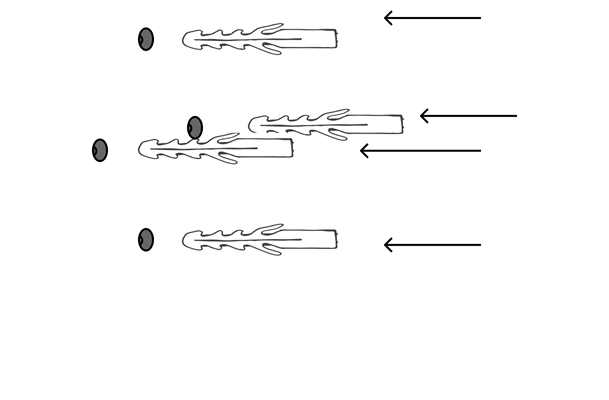
2.Use the corresponding sized drill bit to drill into marked points and insert expansion
inserts a. (e.g. M6 requires 6-mm
diameter drill bit)
3.Place pad eye back on and secure with nails
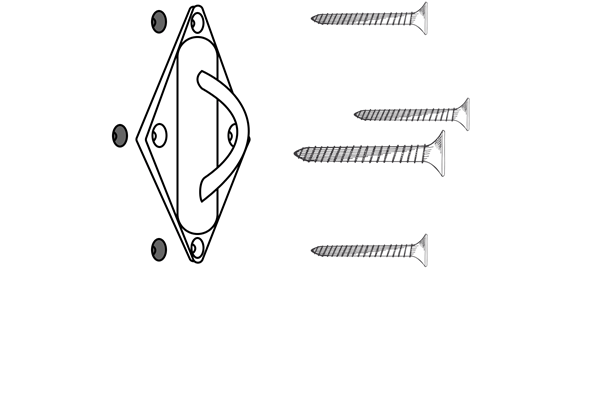
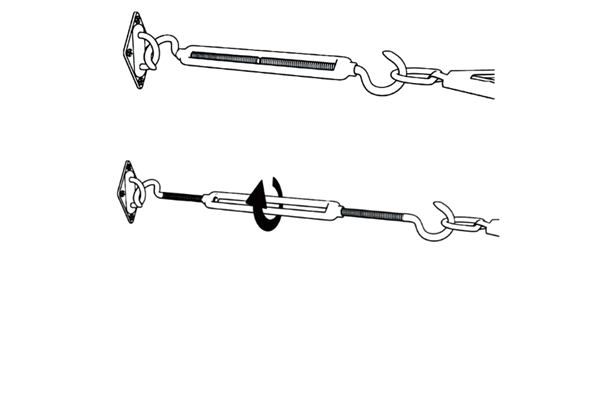
4.
Install snap hook or adjustable turnbuckles as needed and make sure the tension of the shade sail surface
is correctly
distributed. The shade sail should be flat and evenly stretched out in all directions.
Ensure the mounting point direction is a continuation on the diagonal of the shade sail surface for even tension
distribution.
Make sure the shade sails are installed at least 40 degree angle so that water can drain smoothly to prevent pooling
All corners of the shade sail need to be fully stretched out and evenly distributed

Apart from hardware installation kit and ropes we also offer support pole and ring clip that can be used to secure shade
sails
• The pole is secured at the base with four pieces of expansion nails
• Install the ring buckle where you wish the mounting point to be and use with snap hook or turnbuckles to secure your shade.
• The pole is secured at the base with four pieces of expansion nails
• Install the ring buckle where you wish the mounting point to be and use with snap hook or turnbuckles to secure your shade.
WRITE YOUR FEELING
FAQ
Can I leave it up all year round?
Will the colors fade in the sun?